macOS 14 Sonoma or later required

Installing Aurora
takes 2 minutes.

macOS will ask you to confirm a couple of things on first launch.
Here's exactly what to do.

1

Drag Aurora to Applications

Drag the Aurora icon onto the Applications folder shortcut inside the window. Then close the .dmg and launch Aurora from Applications or Spotlight.

💡

Why does macOS block Aurora?

Aurora is a small app not yet distributed through the Mac App Store. macOS requires apps to be notarized or distributed via the App Store to open without this step. Apple charges €99/year for this, which is why we haven't changed the process yet. For now, the steps above are the standard way to install indie Mac software.
2

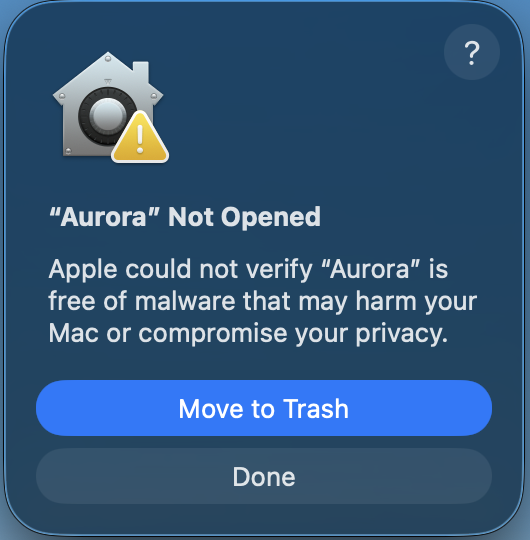
macOS blocks the app: click Done

On first launch, macOS shows a dialog saying "Aurora Not Opened" and offers to move it to Trash. This is expected. Click Done. Do not click Move to Trash.

macOS Aurora Not Opened dialog
3

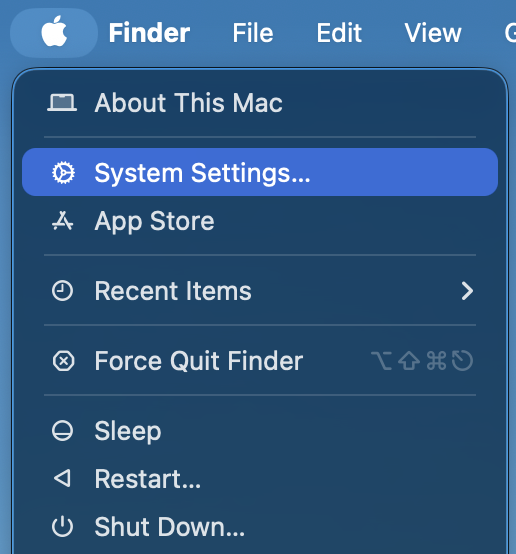
Open System Settings

Click the Apple logo in the top-left corner of your screen and select System Settings.

Apple menu → System Settings
4

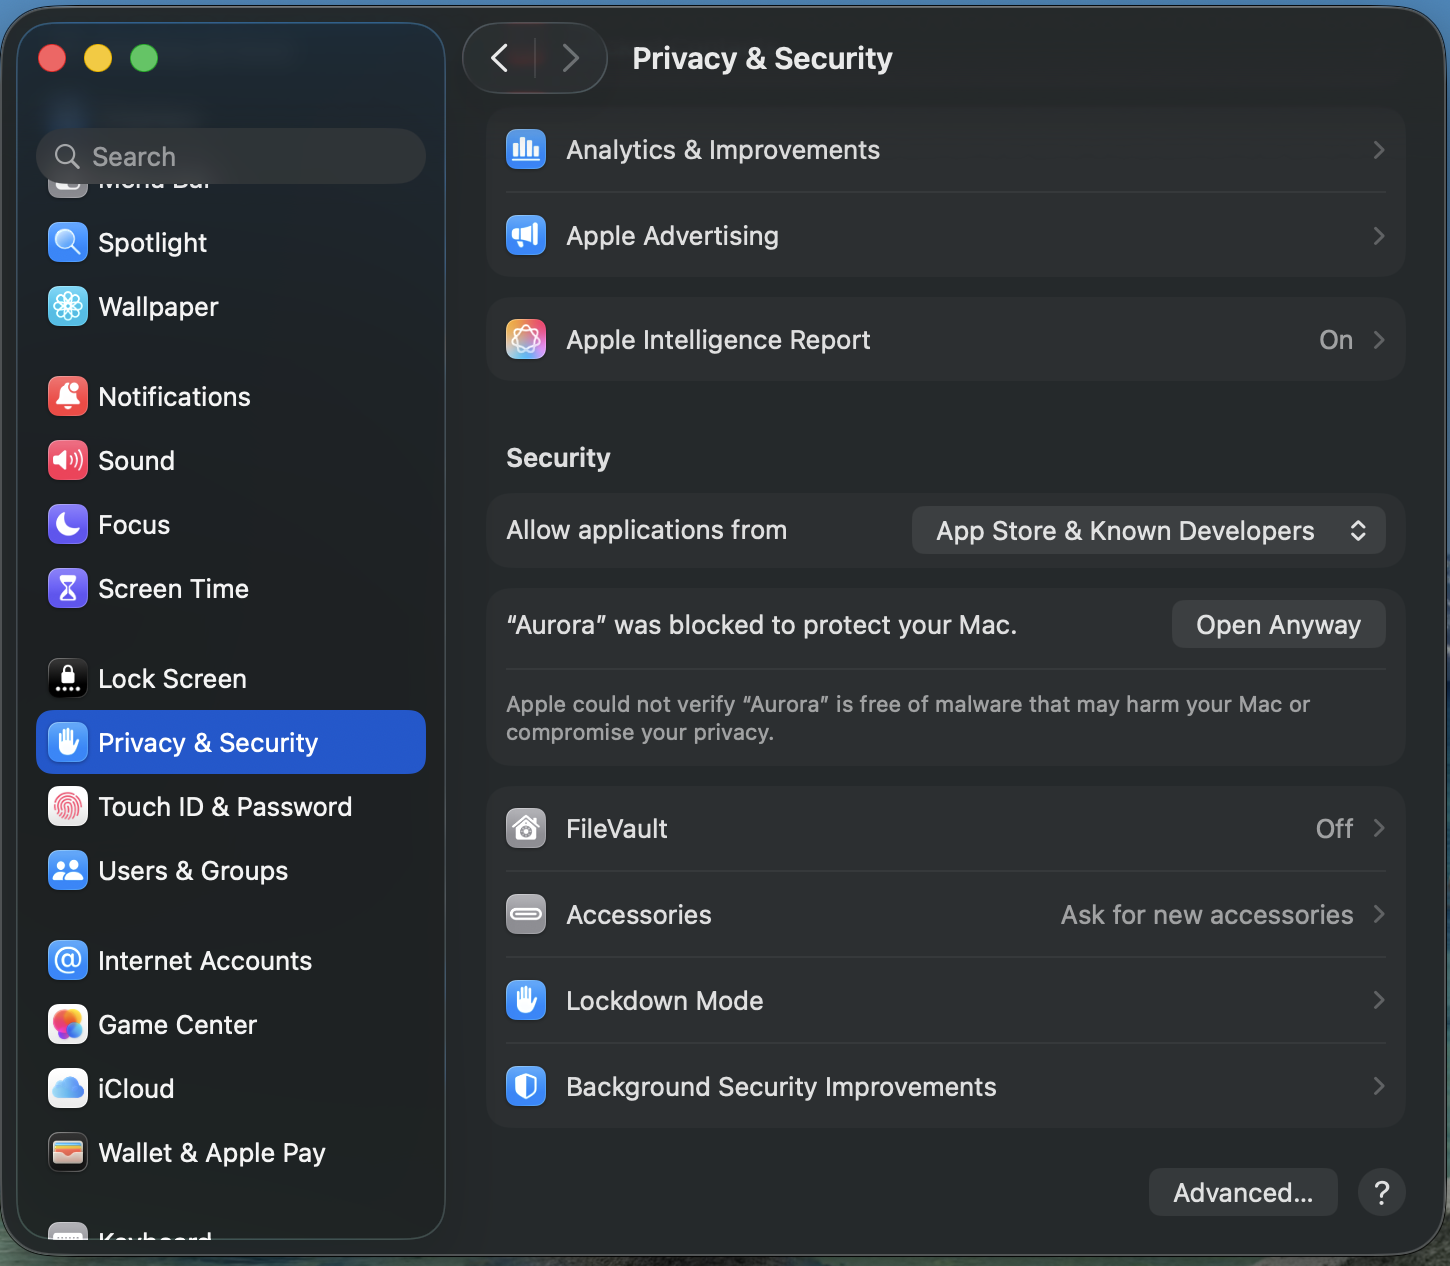
Privacy & Security → Open Anyway

Go to Privacy & Security and scroll down to the Security section, where you'll see "Aurora was blocked from use". Click Open Anyway two times and enter your Mac password when prompted.

Privacy & Security: Open Anyway
5

You're in

Aurora is ready. Connect a card reader, insert your memory card, and Aurora will detect it automatically. Your first import is one click away.

Something didn't work?

Get help on our Discord